RV Air Conditioner Maintenance: Staying Cool on the Road
Understanding Your RV Air Conditioner The Key to Long-Lasting Cooling
Let's face it, an RV trip without a working air conditioner is like camping in a sauna. Understanding how your RV AC unit works is the first step in ensuring it keeps you cool on those hot summer days. RV air conditioners aren't quite the same as the ones you have at home. They're designed to be compact, durable, and energy-efficient (well, relatively!), but they also require regular maintenance to perform optimally.
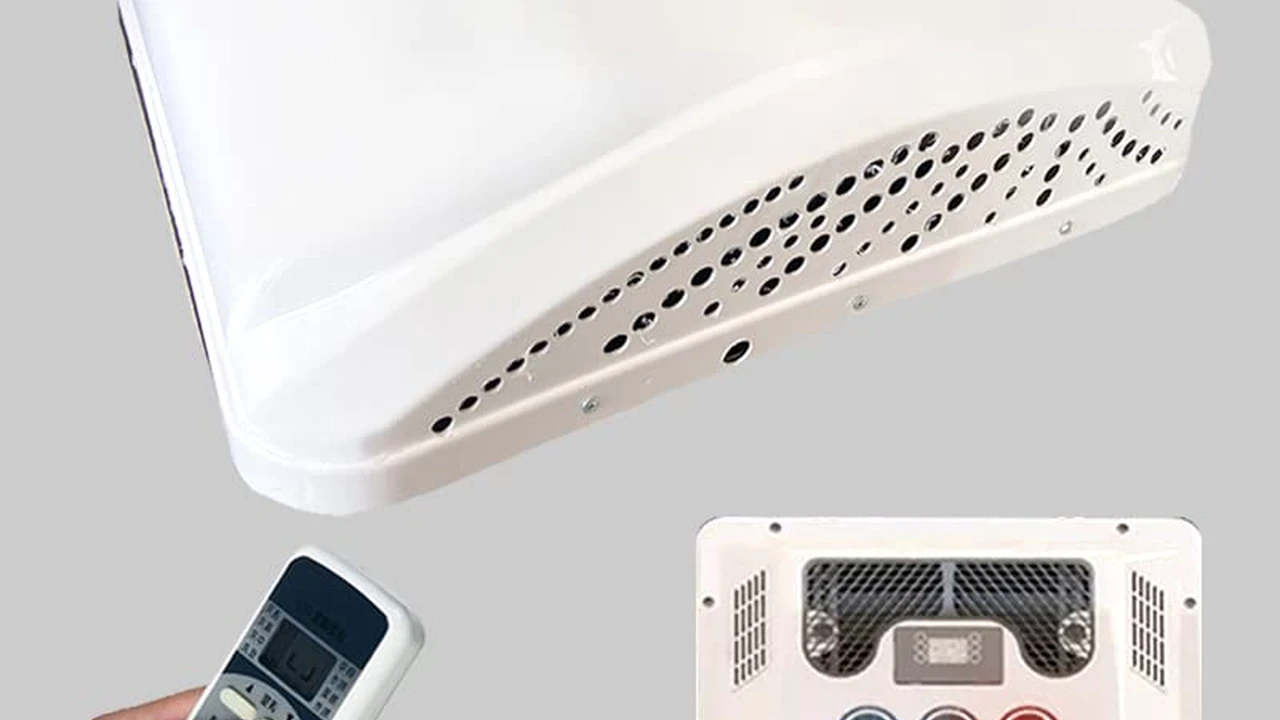
Most RVs use rooftop air conditioners, which are typically self-contained units. These units consist of a compressor, condenser, evaporator, and refrigerant. The compressor circulates the refrigerant, which absorbs heat from inside the RV and releases it outside. The evaporator cools the air that's blown into the RV's interior. Understanding this basic process helps you troubleshoot potential problems later on.
Essential RV AC Maintenance Checklist Keeping Your Unit Running Smoothly
Regular maintenance is crucial for extending the lifespan of your RV air conditioner and preventing costly repairs. Here’s a comprehensive checklist to keep your unit running smoothly:
- Clean the Air Filters Regularly: This is the most important and easiest maintenance task. Dirty air filters restrict airflow, causing the AC unit to work harder and less efficiently. Check the filters at least once a month, and more often if you're camping in dusty environments. You can typically wash reusable filters with mild soap and water, or replace disposable filters.
- Inspect and Clean the Condenser Coils: The condenser coils are located on the outside of the AC unit and dissipate heat. Over time, they can become clogged with dirt, leaves, and other debris, reducing their efficiency. Use a soft brush or a fin comb to gently clean the coils. Be careful not to bend the fins.
- Check the Fan Blades: Inspect the fan blades for cracks, damage, or debris. Clean them with a damp cloth to ensure they're balanced and operating efficiently.
- Inspect the Roof Seal: The seal between the AC unit and the RV roof is crucial for preventing leaks. Check the seal regularly for cracks or damage, and reseal it if necessary. Use a self-leveling sealant specifically designed for RV roofs.
- Check the Electrical Connections: Inspect the electrical connections for corrosion or loose wires. Tighten any loose connections and clean any corroded terminals with a wire brush. If you're not comfortable working with electricity, consult a qualified electrician.
- Run the AC Unit Regularly: Even if you're not using your RV frequently, it's a good idea to run the AC unit for a few minutes each month to keep the refrigerant circulating and prevent the compressor from seizing up.
RV Air Conditioner Filter Cleaning Maintaining Optimal Airflow
Let's dive deeper into the most critical aspect of RV AC maintenance: cleaning the air filters. Think of your AC filter like the lungs of your cooling system. A clogged filter forces the entire system to work harder, consuming more energy and ultimately shortening its lifespan. It also impacts the air quality inside your RV, circulating dust and allergens. Here's a step-by-step guide to cleaning your RV AC filter:
- Locate the Air Filter: The air filter is typically located behind a removable panel on the inside of the RV, near the AC unit. Consult your RV's owner's manual if you're unsure of its location.
- Remove the Air Filter: Carefully remove the air filter from its housing. Take note of the direction it's facing so you can reinstall it correctly.
- Clean the Air Filter:
- Reusable Filters: Wash the filter with mild soap and water. Rinse it thoroughly and allow it to air dry completely before reinstalling. Avoid using harsh chemicals or detergents.
- Disposable Filters: Replace the filter with a new one. Dispose of the old filter properly.
- Reinstall the Air Filter: Reinstall the air filter in its housing, making sure it's facing the correct direction.
- Repeat Regularly: Check and clean or replace the air filter at least once a month, and more often if you're camping in dusty conditions.
RV AC Condenser Coil Cleaning Boosting Cooling Efficiency
Cleaning the condenser coils is another essential maintenance task that can significantly improve the efficiency of your RV air conditioner. Dirty condenser coils restrict airflow and prevent the unit from dissipating heat effectively, leading to reduced cooling performance and increased energy consumption. Here’s how to clean them:
- Turn Off the Power: Before you start cleaning the condenser coils, make sure to turn off the power to the AC unit at the circuit breaker. This is crucial for your safety.
- Access the Condenser Coils: The condenser coils are located on the outside of the AC unit, typically under a protective cover. Remove the cover to access the coils.
- Remove Debris: Use a soft brush or a fin comb to gently remove any loose debris, such as leaves, dirt, and insects, from the coils. Be careful not to bend the fins.
- Clean the Coils: You can use a garden hose with a gentle spray nozzle to rinse the coils. Avoid using high-pressure water, as it can damage the fins. Alternatively, you can use a commercially available coil cleaner specifically designed for RV air conditioners. Follow the instructions on the product label.
- Dry the Coils: Allow the coils to air dry completely before replacing the protective cover.
- Restore Power: Once the coils are dry, replace the cover and restore power to the AC unit.
Troubleshooting Common RV AC Problems Diagnosing and Fixing Issues
Even with regular maintenance, RV air conditioners can sometimes experience problems. Here are some common issues and how to troubleshoot them:
- AC Unit Not Cooling:
- Possible Causes: Dirty air filter, clogged condenser coils, low refrigerant, faulty compressor.
- Troubleshooting Steps: Clean the air filter and condenser coils. Check the refrigerant level (if you're comfortable doing so). If the problem persists, consult a qualified technician.
- AC Unit Making Loud Noises:
- Possible Causes: Loose fan blades, worn bearings, faulty compressor.
- Troubleshooting Steps: Tighten any loose fan blades. Lubricate the bearings (if accessible). If the noise persists, consult a qualified technician.
- AC Unit Leaking Water:
- Possible Causes: Clogged drain line, damaged drain pan.
- Troubleshooting Steps: Clear the drain line with a wire or a wet/dry vacuum. Inspect the drain pan for cracks or damage.
- AC Unit Not Turning On:
- Possible Causes: Blown fuse, tripped circuit breaker, faulty thermostat.
- Troubleshooting Steps: Check the fuse and circuit breaker. Replace the fuse if necessary. Test the thermostat.
RV AC Refrigerant Recharge Knowing When and How
Low refrigerant is a common cause of poor cooling performance in RV air conditioners. Refrigerant is the substance that absorbs heat and cools the air. Over time, refrigerant can leak from the system, reducing its efficiency. Knowing when and how to recharge your RV AC unit with refrigerant is important, but it's also important to understand the safety precautions involved.
When to Recharge: You should consider recharging your AC unit if you notice a significant decrease in cooling performance, even after cleaning the air filter and condenser coils. Other signs include ice buildup on the evaporator coils or a hissing sound coming from the unit.
How to Recharge: Recharging an AC unit with refrigerant requires specialized tools and knowledge. It's generally recommended to have a qualified technician perform this task. Improperly handling refrigerant can be dangerous and can damage the AC unit. However, if you're experienced with HVAC systems and have the necessary tools, you can recharge the unit yourself. You'll need a refrigerant gauge set, a vacuum pump, and the correct type of refrigerant for your AC unit. Follow the instructions in your RV's owner's manual or consult a professional for guidance.
Important Note: It's illegal to intentionally release refrigerant into the atmosphere. Make sure to properly recover and dispose of any refrigerant you remove from the system.
Best RV Air Conditioner Covers Protecting Your Investment
Protecting your RV air conditioner from the elements is crucial for extending its lifespan. An AC cover can shield the unit from rain, snow, sun, and debris, preventing damage and corrosion. Here are some of the best RV air conditioner covers on the market:
- ADCO Designer Series SFS Aqua Shed RV Air Conditioner Cover: This cover is made from a durable, water-resistant fabric that protects against rain, snow, and UV rays. It features a vented design to prevent moisture buildup and comes in various sizes to fit most RV AC units. Price: Around $30-$50
- Camco Vinyl RV Air Conditioner Cover: This cover is made from heavy-duty vinyl and provides excellent protection against the elements. It's easy to install and remove and is available in various sizes. Price: Around $20-$40
- Classic Accessories OverDrive RV Air Conditioner Cover: This cover is made from a durable, weather-resistant fabric and features a zippered closure for easy access. It's designed to fit snugly and provide excellent protection against the elements. Price: Around $40-$60
Example Use Case: If you live in an area with harsh winters, an AC cover can prevent snow and ice from damaging the unit. If you store your RV outdoors, a cover can protect the unit from sun damage and debris.
RV Air Conditioner Upgrade Options Enhancing Cooling Power
If your RV air conditioner is struggling to keep up with the heat, you might consider upgrading to a more powerful unit. Here are some popular upgrade options:
- Dometic Brisk II Air Conditioner: This is a popular choice for RV owners looking for a reliable and efficient air conditioner. It features a compact design, a powerful cooling capacity, and a user-friendly thermostat. Price: Around $600-$800
- Coleman Mach 15 Air Conditioner: This is a high-performance air conditioner that provides excellent cooling power. It features a durable construction, a quiet operation, and a multi-speed fan. Price: Around $700-$900
- RecPro RV Rooftop Air Conditioner: This is a budget-friendly option that offers decent cooling performance. It features a simple design, a lightweight construction, and an easy installation process. Price: Around $400-$600
Product Comparison: The Dometic Brisk II is known for its reliability and efficiency, while the Coleman Mach 15 is known for its powerful cooling capacity. The RecPro RV Rooftop Air Conditioner is a good option for those on a budget.
RV Air Conditioner Efficiency Tips Maximizing Cooling Minimizing Energy Use
Even with a well-maintained and powerful AC unit, there are several things you can do to maximize cooling efficiency and minimize energy use:
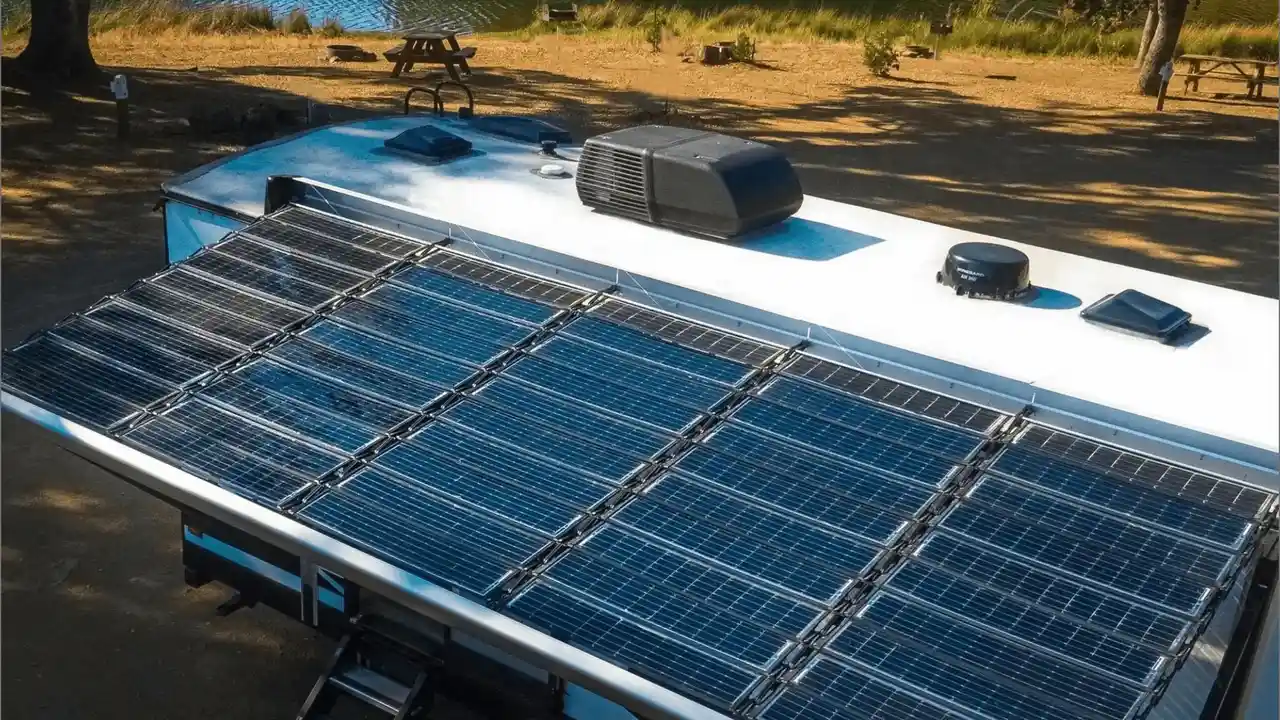
- Park in the Shade: Parking in the shade can significantly reduce the amount of heat that enters your RV, reducing the workload on your air conditioner.
- Use Window Coverings: Close your window shades or curtains during the day to block out sunlight and prevent heat from entering the RV.
- Use Fans: Use fans to circulate the cool air throughout the RV. Ceiling fans, portable fans, and vent fans can all help improve airflow.
- Avoid Cooking During the Hottest Hours: Cooking inside the RV can generate a lot of heat. Try to avoid cooking during the hottest hours of the day, or cook outdoors if possible.
- Seal Air Leaks: Seal any air leaks around windows, doors, and vents to prevent cool air from escaping.
- Use a Programmable Thermostat: A programmable thermostat allows you to set the temperature to automatically adjust throughout the day, saving energy when you're not in the RV.
RV Air Conditioner Winterization Preparing for Cold Weather Storage
If you live in an area with cold winters, it's important to winterize your RV air conditioner to protect it from damage. Here's how:
- Clean the AC Unit: Clean the air filter and condenser coils to remove any dirt and debris.
- Cover the AC Unit: Install an AC cover to protect the unit from the elements.
- Remove the Drain Plug: Remove the drain plug to allow any water to drain out of the unit.
- Inspect for Damage: Inspect the AC unit for any signs of damage, such as cracks or leaks. Repair any damage before storing the RV.
RV Air Conditioner Maintenance Costs Budgeting for Repairs and Upkeep
Maintaining your RV air conditioner can involve various costs, including:
- Air Filter Replacement: $5-$20 per filter
- Condenser Coil Cleaner: $10-$30 per bottle
- AC Cover: $20-$60
- Professional AC Service: $100-$300 per visit
- Refrigerant Recharge: $150-$400
- AC Unit Replacement: $400-$1000+
Budgeting Tip: Set aside a small amount of money each year for RV AC maintenance and repairs. This will help you avoid unexpected expenses and keep your AC unit running smoothly.
Choosing the Right RV Air Conditioner For Your Needs A Buying Guide
Selecting the right RV air conditioner depends on several factors, including the size of your RV, your budget, and your cooling needs. Here's a buying guide to help you make the right choice:
- BTU Rating: The BTU (British Thermal Unit) rating measures the cooling capacity of the AC unit. A higher BTU rating means more cooling power. Choose a BTU rating that's appropriate for the size of your RV. A general rule of thumb is 300 BTU per square foot.
- Energy Efficiency: Look for an AC unit with a high Energy Efficiency Ratio (EER). A higher EER means the unit is more energy-efficient.
- Noise Level: Consider the noise level of the AC unit. Some units are quieter than others. Look for a unit with a low decibel (dB) rating.
- Features: Consider the features that are important to you, such as a programmable thermostat, a remote control, and multiple fan speeds.
- Warranty: Choose an AC unit with a good warranty. This will protect you against defects and failures.
RV Air Conditioner DIY Repairs When to Tackle It Yourself
While some RV AC repairs are best left to professionals, there are several DIY repairs that you can tackle yourself:
- Cleaning the Air Filter: This is a simple and straightforward task that anyone can do.
- Cleaning the Condenser Coils: This is also a relatively easy task, but you need to be careful not to damage the fins.
- Replacing a Blown Fuse: This is a simple task that requires basic electrical knowledge.
- Clearing a Clogged Drain Line: This can usually be done with a wire or a wet/dry vacuum.
When to Call a Professional: If you're not comfortable working with electricity, or if you suspect a major problem with your AC unit, it's best to call a qualified technician. Attempting to repair a complex issue yourself can be dangerous and can potentially damage the unit further.
RV Air Conditioner and Generator Compatibility Powering Your AC on the Go
If you plan on using your RV air conditioner while boondocking (camping without hookups), you'll need a generator to power it. Here are some things to consider when choosing a generator for your RV air conditioner:
- Starting Watts: The starting watts are the amount of power required to start the AC unit. Make sure your generator has enough starting watts to handle the AC unit's surge.
- Running Watts: The running watts are the amount of power required to keep the AC unit running. Make sure your generator has enough running watts to handle the AC unit's continuous power draw.
- Generator Size: Choose a generator that's large enough to power your AC unit and any other appliances you plan on using simultaneously.
- Generator Type: Inverter generators are quieter and more fuel-efficient than conventional generators. They're also safer for sensitive electronics.
Extending the Life of Your RV Air Conditioner Proactive Maintenance Strategies
By following these proactive maintenance strategies, you can extend the life of your RV air conditioner and avoid costly repairs:
- Regularly Clean the Air Filter: This is the most important maintenance task.
- Clean the Condenser Coils: Keep the coils clean to ensure efficient cooling.
- Inspect the Roof Seal: Check the seal regularly for cracks or damage.
- Run the AC Unit Regularly: Keep the refrigerant circulating and prevent the compressor from seizing up.
- Protect the AC Unit from the Elements: Use an AC cover when storing the RV.
- Schedule Regular Maintenance: Have a qualified technician inspect and service your AC unit every few years.
RV Air Conditioner Noise Reduction Tips Minimizing Disturbances
A noisy RV air conditioner can be a major annoyance, especially when you're trying to relax or sleep. Here are some tips for reducing the noise level of your AC unit:
- Use Sound Dampening Materials: Install sound dampening materials around the AC unit to absorb noise.
- Check for Loose Parts: Tighten any loose parts, such as fan blades or screws.
- Lubricate Moving Parts: Lubricate any moving parts that are squeaking or grinding.
- Consider an Upgraded AC Unit: Some newer AC units are designed to be quieter than older models.
RV Air Conditioner Smart Technology Integration Remote Control and Monitoring
Some newer RV air conditioners offer smart technology integration, allowing you to control and monitor the unit remotely using your smartphone or tablet. These features can include:
- Remote Control: Adjust the temperature, fan speed, and mode from anywhere.
- Temperature Monitoring: Monitor the temperature inside your RV.
- Energy Usage Tracking: Track your energy consumption and identify ways to save energy.
- Alerts and Notifications: Receive alerts if there's a problem with the AC unit, such as low refrigerant or a power outage.
:max_bytes(150000):strip_icc()/277019-baked-pork-chops-with-cream-of-mushroom-soup-DDMFS-beauty-4x3-BG-7505-5762b731cf30447d9cbbbbbf387beafa.jpg)