7 Essential RV Maintenance Tasks You Should Never Skip
RV Roof Maintenance Ensuring Longevity and Preventing Leaks
Your RV roof is your first line of defense against the elements. Neglecting it can lead to costly leaks and structural damage. Regular inspection and maintenance are crucial for extending its lifespan.
Inspecting Your RV Roof for Potential Problems
Start with a thorough visual inspection. Look for cracks, tears, or bubbling in the sealant. Pay close attention to seams, vents, and around any rooftop accessories like air conditioners or antennas. Use a ladder safely and have someone spot you.
Cleaning Your RV Roof Removing Debris and Grime
Dirt, leaves, and other debris can trap moisture and promote mold growth. Clean your RV roof at least twice a year using a mild soap and water solution. Avoid harsh chemicals or abrasive cleaners that can damage the roofing material. A soft-bristled brush is ideal for removing stubborn dirt.
Sealing RV Roof Seams and Penetrations Preventing Water Damage
The sealant around seams and penetrations is prone to cracking and drying out over time. Regularly inspect these areas and reseal them as needed. Use a self-leveling sealant specifically designed for RV roofs. Dicor Lap Sealant is a popular and reliable choice. A single tube typically costs between $15 and $25, depending on the retailer. It's easy to apply with a caulking gun and provides excellent protection against water intrusion.
Dicor Lap Sealant A Detailed Review
Dicor Lap Sealant is a widely used and highly regarded product for RV roof maintenance. Its self-leveling formula makes it easy to apply, even for beginners. It creates a watertight seal that is resistant to UV rays and extreme temperatures. It's compatible with most RV roofing materials, including EPDM rubber, fiberglass, and aluminum. Many RV owners swear by Dicor and use it exclusively for all their roof sealing needs. The price point is reasonable, and the ease of application makes it a worthwhile investment in protecting your RV.
Alternatives to Dicor Lap Sealant
While Dicor is a top choice, there are other sealant options available. Geocel Pro Flex RV Flexible Sealant is another popular option known for its flexibility and durability. It's slightly more expensive than Dicor, typically around $20-$30 per tube, but it offers superior adhesion and resistance to cracking. Another alternative is Eternabond RoofSeal Tape, which is a self-adhesive tape that provides a permanent seal. It's more expensive than liquid sealants, costing around $40-$60 per roll, but it's incredibly durable and requires minimal preparation. The best choice for you will depend on your specific needs and budget.
Protecting Your RV Roof with a Protective Coating
Applying a protective coating can further extend the life of your RV roof. These coatings provide an extra layer of protection against UV rays, weather damage, and wear and tear. Consider using a specialized RV roof coating like Kool Seal Elastomeric Roof Coating. It provides a reflective surface that helps to keep your RV cooler in hot weather. A five-gallon bucket typically costs around $150-$200 and can cover a significant portion of your RV roof. The application process involves cleaning the roof thoroughly and applying the coating with a roller or brush.
RV Tire Maintenance Ensuring Safety and Preventing Blowouts
Your RV tires are crucial for safe travel. Proper tire maintenance can prevent blowouts, improve fuel economy, and extend tire life. Neglecting your tires can have serious consequences.
Checking RV Tire Pressure Regularly
Check your RV tire pressure before each trip and periodically during long journeys. Use a reliable tire pressure gauge. Refer to your RV's owner's manual or the sticker on the driver's side door for the recommended tire pressure. Underinflated tires can overheat and lead to blowouts. Overinflated tires can reduce traction and make for a bumpy ride. A good digital tire pressure gauge, like the Accutire MS-4021B, costs around $15-$20 and provides accurate readings.
Inspecting RV Tires for Wear and Damage
Inspect your RV tires regularly for signs of wear and damage, such as cracks, bulges, or uneven wear. Pay close attention to the sidewalls, as they are more susceptible to damage. Check the tread depth using a penny test. If the top of Lincoln's head is visible, your tires are worn and need to be replaced. Look for embedded objects like nails or screws. If you find any damage, consult a tire professional.
Rotating RV Tires for Even Wear
Rotating your RV tires helps to ensure even wear and extend their lifespan. Consult your RV's owner's manual for the recommended rotation pattern. If you're not comfortable rotating your tires yourself, take your RV to a tire shop. Tire rotation typically costs between $50 and $100, depending on the shop and the size of your RV.
Using RV Tire Covers for UV Protection
UV rays can damage your RV tires over time, causing them to crack and deteriorate. When your RV is parked for extended periods, use tire covers to protect them from the sun. Tire covers are relatively inexpensive, costing around $20-$40 per set. They are easy to install and can significantly extend the life of your tires.
Investing in a Tire Pressure Monitoring System (TPMS) for RVs
A Tire Pressure Monitoring System (TPMS) can provide real-time monitoring of your RV tire pressure and temperature. This can help you to detect problems early and prevent blowouts. TPMS systems typically consist of sensors that are installed on the tires and a display unit that is mounted in the cab. Some TPMS systems also include alerts that will notify you if your tire pressure or temperature exceeds a certain threshold. A reliable TPMS system, like the EEZTire TPMS, costs around $200-$400. While it's an investment, it can provide peace of mind and potentially save you from costly repairs or accidents.
EEZTire TPMS A Comprehensive Overview
The EEZTire TPMS is a popular choice among RV owners. It offers real-time monitoring of tire pressure and temperature, and it includes audible and visual alerts for low pressure, high pressure, and high temperature. The system is easy to install and use, and it's compatible with a wide range of RV tire sizes. The sensors are durable and waterproof, and the display unit is easy to read, even in bright sunlight. Many RVers appreciate the peace of mind that the EEZTire TPMS provides, knowing that they can monitor their tire conditions at all times.
Alternatives to EEZTire TPMS
While EEZTire is a well-regarded TPMS system, there are other options available. The TireMinder A1A TPMS is another popular choice, known for its ease of use and reliability. It offers similar features to the EEZTire system, including real-time monitoring, alerts, and compatibility with a wide range of RV tire sizes. The price is comparable to the EEZTire, around $250-$450. Another alternative is the Truck System Technologies (TST) TPMS, which is a more advanced system that offers additional features, such as customizable alerts and data logging. However, it's also more expensive, costing around $400-$600. The best TPMS system for you will depend on your specific needs and budget.
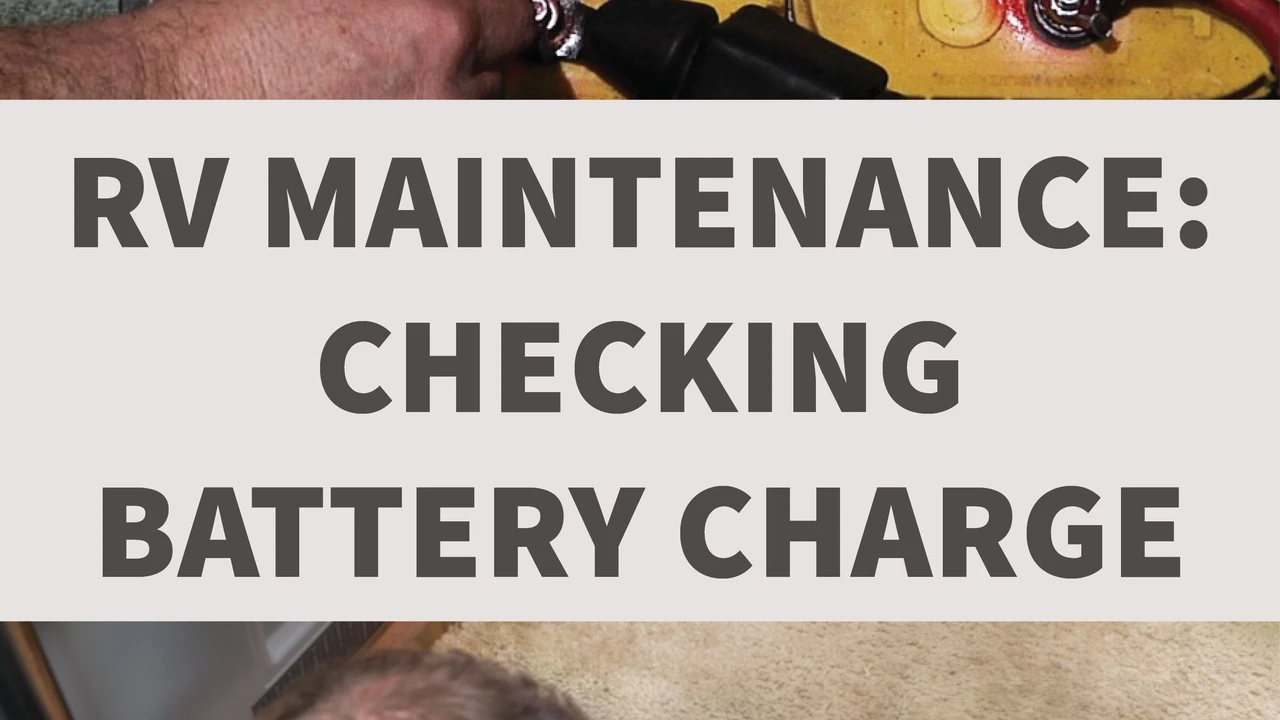
RV Battery Maintenance Prolonging Lifespan and Ensuring Power
Your RV batteries provide power for your appliances, lights, and other electrical devices. Proper battery maintenance can prolong their lifespan and ensure that you have power when you need it.
Checking RV Battery Water Levels Regularly
If you have flooded lead-acid batteries, check the water levels regularly. Use distilled water to refill the cells as needed. Do not overfill the cells, as this can cause acid to spill out. Low water levels can damage the battery plates and shorten the battery's lifespan. A battery hydrometer, which measures the specific gravity of the electrolyte, can help you assess the battery's state of charge. A hydrometer costs around $10-$15 and is a worthwhile investment for maintaining flooded lead-acid batteries.
Cleaning RV Battery Terminals Preventing Corrosion
Corrosion can build up on your RV battery terminals, reducing the flow of electricity. Clean the terminals regularly with a wire brush and a baking soda solution. Apply a corrosion protectant to the terminals to prevent future corrosion. Battery terminal cleaner and protectant spray is available at most auto parts stores for around $5-$10.
Charging RV Batteries Properly Avoiding Overcharging
Overcharging your RV batteries can damage them and shorten their lifespan. Use a smart battery charger that automatically adjusts the charging current to prevent overcharging. A good smart battery charger, like the NOCO Genius GEN5, costs around $80-$120. It's an investment that will pay for itself in the long run by extending the life of your batteries.
Storing RV Batteries Properly During Off-Season
If you're storing your RV for the off-season, disconnect the batteries and store them in a cool, dry place. Fully charge the batteries before storing them. Consider using a battery maintainer to keep the batteries charged during storage. A battery maintainer, like the Battery Tender Plus, costs around $30-$50 and will keep your batteries in top condition during the off-season.
Upgrading to Lithium-Ion RV Batteries for Enhanced Performance
Lithium-ion batteries are becoming increasingly popular among RV owners due to their superior performance and longevity. They offer several advantages over traditional lead-acid batteries, including higher energy density, faster charging, and longer lifespan. While lithium-ion batteries are more expensive than lead-acid batteries, they can be a worthwhile investment for RVers who demand the best performance and reliability. A single 100Ah lithium-ion battery typically costs around $500-$800.
Battle Born Batteries A Detailed Examination
Battle Born Batteries are a leading brand of lithium-ion batteries for RVs. They are known for their high quality, durability, and long lifespan. Battle Born batteries are designed specifically for RV use and can withstand the rigors of travel. They also feature a built-in battery management system (BMS) that protects the battery from overcharging, over-discharging, and overheating. Many RVers who have switched to Battle Born batteries rave about their performance and reliability. While the initial investment is higher, the long-term benefits of lithium-ion batteries, such as longer lifespan and reduced maintenance, can make them a cost-effective choice.
Alternatives to Battle Born Batteries
While Battle Born is a top brand, there are other lithium-ion battery options to consider. Victron Energy offers a range of high-quality lithium-ion batteries that are known for their performance and reliability. They are slightly more expensive than Battle Born, but they offer advanced features such as remote monitoring and control. Another alternative is Renogy, which offers a more affordable option for RVers on a budget. Renogy lithium-ion batteries are still a good quality option, but they may not have all the advanced features of Battle Born or Victron Energy. The best choice for you will depend on your specific needs and budget.
RV Water System Maintenance Ensuring Clean and Safe Water
Your RV water system provides you with clean and safe water for drinking, cooking, and showering. Proper maintenance is essential for preventing contamination and ensuring that your water system functions properly.
Sanitizing Your RV Water System Regularly
Sanitize your RV water system at least twice a year, or more often if you suspect contamination. Use a bleach solution to kill bacteria and algae. Follow the instructions in your RV's owner's manual or online resources for the proper sanitization procedure. A common method involves adding 1/4 cup of household bleach per 15 gallons of water to the fresh water tank, running the solution through all the faucets and shower, letting it sit for several hours, and then flushing the system with fresh water. The cost of sanitizing your water system is minimal, as it only requires a small amount of bleach.
Draining Your RV Water Heater Annually
Drain your RV water heater annually to remove sediment and prevent corrosion. Turn off the water heater and let it cool down completely before draining it. Open the drain valve and allow the water to drain out. Consider using a water heater tank rinser to remove stubborn sediment. These rinsers attach to a garden hose and spray water into the tank to dislodge sediment. A water heater tank rinser costs around $10-$20 and can help to extend the life of your water heater.
Replacing Your RV Water Filter Regularly
Replace your RV water filter regularly to remove sediment, chlorine, and other contaminants from your water. The frequency of replacement will depend on the type of filter you use and the quality of your water source. A good quality RV water filter, like the Camco TastePURE RV Water Filter, costs around $15-$25 and should be replaced every 3-6 months. Using a water filter can significantly improve the taste and quality of your drinking water.
Winterizing Your RV Water System Preventing Freeze Damage
If you live in a cold climate, winterize your RV water system before the first freeze to prevent burst pipes and other damage. Drain all the water from the system, including the water heater, fresh water tank, and pipes. Add RV antifreeze to the plumbing system to protect it from freezing. Follow the instructions in your RV's owner's manual or online resources for the proper winterization procedure. RV antifreeze typically costs around $10-$15 per gallon, and you will need several gallons to winterize your RV.
Installing a Whole-House RV Water Filter System for Superior Water Quality
For the best possible water quality, consider installing a whole-house RV water filter system. These systems filter all the water that enters your RV, providing clean and safe water for all your needs. They typically consist of multiple filters that remove sediment, chlorine, and other contaminants. While whole-house systems are more expensive than individual filters, they offer superior water quality and convenience. A good quality whole-house RV water filter system, like the Clear2O DirtGuard RV Inline Water Filter System, costs around $100-$200.
Clear2O DirtGuard RV Inline Water Filter System An In-Depth Analysis
The Clear2O DirtGuard RV Inline Water Filter System is a popular choice for RVers looking for a comprehensive water filtration solution. It features a multi-stage filtration process that removes sediment, chlorine, and other contaminants, providing clean and safe water for drinking, cooking, and showering. The system is easy to install and use, and it comes with all the necessary fittings and hardware. Many RVers who have installed the Clear2O system report a significant improvement in the taste and quality of their water. The filters are replaceable and typically last for several months, depending on the water quality.
Alternatives to Clear2O DirtGuard RV Inline Water Filter System
While Clear2O is a well-regarded system, there are other whole-house RV water filter options available. The Camco EVO Premium RV Water Filter System is another popular choice, known for its ease of use and effectiveness. It offers similar features to the Clear2O system, including multi-stage filtration and easy installation. The price is comparable to the Clear2O, around $120-$220. Another alternative is the Watts RV PRO-2000 Water Filter System, which is a more advanced system that offers additional features, such as a backwash valve for easy cleaning. However, it's also more expensive, costing around $200-$300. The best system for you will depend on your specific needs and budget.
RV Awning Maintenance Keeping it Clean and Functional
Your RV awning provides shade and protection from the elements. Proper maintenance can keep it clean and functional for years to come.
Cleaning Your RV Awning Regularly
Clean your RV awning regularly to remove dirt, mildew, and other stains. Use a mild soap and water solution and a soft-bristled brush. Avoid harsh chemicals or abrasive cleaners that can damage the awning fabric. For stubborn stains, consider using a specialized RV awning cleaner, like the Star Brite RV Awning Cleaner. It's designed to remove tough stains without damaging the fabric. A bottle typically costs around $10-$15 and can be used on a variety of awning fabrics.
Inspecting Your RV Awning for Damage
Inspect your RV awning regularly for tears, rips, or other damage. Repair any damage promptly to prevent it from getting worse. Small tears can often be repaired with awning repair tape. Larger tears may require professional repair. Awning repair tape, like the Tear-Aid Fabric Repair Kit, costs around $15-$25 and can be a lifesaver for minor repairs.
Lubricating RV Awning Arms and Mechanisms
Lubricate the awning arms and mechanisms regularly to keep them operating smoothly. Use a silicone-based lubricant. Avoid using oil-based lubricants, as they can attract dirt and grime. Silicone lubricant spray is available at most hardware stores for around $5-$10.
Storing Your RV Awning Properly During High Winds
During high winds, retract your RV awning to prevent damage. Strong winds can easily tear or damage the awning fabric. If you're not able to retract the awning, secure it with awning tie-downs. Awning tie-downs are straps that attach to the awning and stake into the ground. They provide extra stability and prevent the awning from blowing away. Awning tie-downs typically cost around $20-$40 per set.
Upgrading to a High-Quality RV Awning Fabric for Enhanced Durability
If your RV awning fabric is damaged or worn, consider upgrading to a high-quality replacement fabric. Acrylic fabrics are more durable and resistant to fading than vinyl fabrics. They also breathe better, which helps to prevent mildew growth. Replacing your awning fabric can be a significant investment, costing around $300-$600, but it can significantly extend the life of your awning.
Carefree of Colorado RV Awning Fabrics A Detailed Look
Carefree of Colorado is a leading manufacturer of RV awnings and awning fabrics. They offer a wide range of high-quality fabrics that are designed to withstand the rigors of RV travel. Carefree's acrylic fabrics are known for their durability, fade resistance, and breathability. They also offer a variety of colors and patterns to choose from. Many RVers who have replaced their awning fabric with a Carefree fabric are impressed with the quality and performance. The initial investment is higher, but the long-term benefits of a durable and long-lasting fabric can make it a worthwhile choice.
Alternatives to Carefree of Colorado RV Awning Fabrics
While Carefree is a top brand, there are other awning fabric options to consider. Dometic also offers a range of high-quality RV awning fabrics that are known for their durability and style. They are comparable in price to Carefree fabrics. Another alternative is RecPro, which offers a more affordable option for RVers on a budget. RecPro awning fabrics are still a good quality option, but they may not have all the advanced features of Carefree or Dometic fabrics. The best choice for you will depend on your specific needs and budget.
RV Generator Maintenance Ensuring Reliable Power on the Go
Your RV generator provides you with power when you're not connected to shore power. Proper maintenance is essential for ensuring that your generator runs reliably.
Changing RV Generator Oil Regularly
Change your RV generator oil regularly according to the manufacturer's recommendations. Use the recommended type of oil. Check the oil level before each trip and add oil as needed. Regular oil changes help to keep the engine running smoothly and prevent damage. Generator oil change kits, like the Onan Generator Oil and Filter Change Kit, cost around $30-$40 and include everything you need for an oil change.
Replacing RV Generator Air Filter Regularly
Replace your RV generator air filter regularly to keep the engine breathing properly. A dirty air filter can restrict airflow and reduce engine performance. Check the air filter regularly and replace it as needed. A new air filter typically costs around $10-$20.
Cleaning RV Generator Spark Plug Regularly
Clean your RV generator spark plug regularly to ensure proper ignition. A dirty spark plug can cause the engine to misfire and run poorly. Use a wire brush to clean the spark plug. Replace the spark plug if it's worn or damaged. A new spark plug typically costs around $5-$10.
Running Your RV Generator Regularly
Run your RV generator regularly, even when you're not using it, to keep the engine lubricated and prevent fuel from going stale. Run the generator for at least 30 minutes each month. This helps to keep the fuel system clean and prevent corrosion.
Using a Fuel Stabilizer in Your RV Generator
When storing your RV for extended periods, add a fuel stabilizer to the gasoline in the generator's fuel tank. Fuel stabilizer prevents the gasoline from breaking down and forming gum and varnish, which can clog the fuel system. A bottle of fuel stabilizer, like the STA-BIL Fuel Stabilizer, costs around $10-$15 and can protect your generator's fuel system for up to 12 months.
Investing in a Portable RV Generator for Backup Power
While your built-in RV generator is convenient, it's always a good idea to have a portable generator as a backup. A portable generator can provide power in case your built-in generator fails or if you need power in a location where you can't run your built-in generator. A reliable portable generator, like the Honda EU2200i, costs around $1000-$1200. While it's an investment, it can provide peace of mind knowing that you'll always have a backup power source.
Honda EU2200i Portable Generator A Detailed Review
The Honda EU2200i is a popular choice among RVers for its quiet operation, fuel efficiency, and reliability. It produces 2200 watts of power, which is enough to run most RV appliances, including air conditioners. The EU2200i is also lightweight and easy to transport. Many RVers appreciate the quiet operation of the EU2200i, which makes it ideal for camping in areas where noise is a concern. While the Honda EU2200i is more expensive than some other portable generators, its quality and reliability make it a worthwhile investment.
Alternatives to Honda EU2200i Portable Generator
While Honda is a top brand, there are other portable generator options to consider. The Yamaha EF2200iS is another popular choice, known for its quiet operation and fuel efficiency. It offers similar features to the Honda EU2200i, and the price is comparable. Another alternative is the Champion 3400-Watt Dual Fuel Inverter Generator, which is a more affordable option that can run on either gasoline or propane. However, it's not as quiet as the Honda or Yamaha generators. The best choice for you will depend on your specific needs and budget.
RV Sealant Maintenance Preventing Leaks and Water Damage
Maintaining the seals and caulking around your RV is critical to preventing water leaks and the resulting damage. Regular inspection and upkeep can save you from costly repairs down the road.
Inspecting Seals and Caulking Regularly
Make it a habit to inspect all seals and caulking around your RV at least twice a year. Pay special attention to areas around windows, doors, vents, seams, and any other openings in the RV's exterior. Look for cracks, gaps, peeling, or any signs of deterioration. Early detection of these issues can prevent water from seeping in and causing significant damage.
Cleaning Surfaces Before Applying Sealant
Before applying any sealant, it's crucial to thoroughly clean the surfaces. Remove any old sealant, dirt, grease, or debris. Use a scraper, putty knife, or sealant removal tool to carefully remove the old sealant. Clean the area with a solvent like mineral spirits or isopropyl alcohol to ensure a clean, dry surface for the new sealant to adhere to. This step is essential for a long-lasting and effective seal.
Choosing the Right Type of RV Sealant
Selecting the right type of sealant is crucial for a successful repair. Different sealants are designed for different purposes and materials. For general sealing around windows, doors, and vents, a self-leveling lap sealant is often recommended. For seams and joints, a flexible sealant like polyurethane or silicone is a good choice. Always check the sealant's compatibility with the RV's materials. Some popular RV sealant brands include Dicor, Geocel, and Sikaflex. Consider the specific application and material when choosing the best sealant for the job.
Applying Sealant Properly for a Watertight Seal
Proper application of sealant is essential for creating a watertight seal. Use a caulking gun to apply the sealant in a smooth, consistent bead. Overlap the old sealant slightly to ensure a good bond. Use a finger or a sealant smoothing tool to create a smooth, even finish. Remove any excess sealant with a damp cloth. Allow the sealant to cure completely according to the manufacturer's instructions before exposing it to water or other elements.
Using Sealant Tape for Added Protection
Sealant tape can provide an extra layer of protection against water leaks. It's particularly useful for sealing seams and joints. Apply the sealant tape over the area to be sealed, pressing it firmly into place. Trim any excess tape with a utility knife. Sealant tape is a convenient and effective way to reinforce seals and prevent water intrusion. Eternabond RoofSeal Tape is a popular and highly-rated option.
Removing and Replacing Damaged Sealant Promptly
If you find any damaged or deteriorated sealant, remove and replace it promptly. Don't wait until the damage gets worse. Use a sealant removal tool or a putty knife to carefully remove the old sealant. Clean the area thoroughly and apply new sealant as described above. Addressing sealant issues promptly can prevent water damage and costly repairs.
Investing in a Sealant Application Kit for Convenience
A sealant application kit can make the job of applying sealant easier and more efficient. These kits typically include a caulking gun, sealant smoothing tools, sealant removal tools, and other accessories. A sealant application kit can save you time and effort and help you achieve a professional-looking result. These kits range in price from $20 to $50, depending on the included tools.
Consider Professional RV Sealant Services
If you're not comfortable performing sealant maintenance yourself, consider hiring a professional RV sealant service. They have the expertise and equipment to properly inspect, clean, and seal your RV. A professional sealant service can provide peace of mind knowing that your RV is properly protected from water damage. Prices for professional sealant services vary depending on the size and complexity of the job.
:max_bytes(150000):strip_icc()/277019-baked-pork-chops-with-cream-of-mushroom-soup-DDMFS-beauty-4x3-BG-7505-5762b731cf30447d9cbbbbbf387beafa.jpg)