RV Water System Maintenance: Preventing Contamination
Prepare your RV for winter with our comprehensive guide on RV water system winterization. Learn step-by-step instructions, tips, and product recommendations to prevent costly damage from freezing temperatures.
Understanding the Importance of RV Water System Winterization
Winterizing your RV's water system is absolutely crucial, especially if you live in an area prone to freezing temperatures. Water expands when it freezes, and this expansion can cause significant damage to your RV's plumbing, including pipes, fittings, water pumps, and even your water heater. Ignoring this preventative maintenance can lead to costly repairs and a major headache come spring. Think of it as an investment in the longevity and reliability of your recreational vehicle. It's not just about avoiding repairs; it's about preserving the overall value of your RV and ensuring you can enjoy worry-free travels for years to come.
When to Winterize Your RV Water System
Knowing when to winterize is just as important as knowing how. Generally, you should winterize your RV any time it will be exposed to freezing temperatures for an extended period. A good rule of thumb is to start thinking about winterizing when nighttime temperatures consistently dip below freezing (32°F or 0°C). Even if temperatures fluctuate above freezing during the day, prolonged exposure to freezing nights can still cause damage. Don't wait until the last minute; proactively winterizing your RV before the deep freeze hits will give you peace of mind and prevent potential problems.
Essential Tools and Materials for RV Winterization
Before you begin the winterization process, gather all the necessary tools and materials. This will save you time and prevent frustration. Here's a comprehensive list:
- RV Antifreeze (Non-Toxic): This is the most crucial ingredient. Make sure you use RV antifreeze, which is specifically formulated for potable water systems and is non-toxic. Do not use automotive antifreeze!
- Water Heater Bypass Kit (if applicable): This kit allows you to bypass the water heater, preventing it from filling with antifreeze.
- Water Pump Converter Kit or Siphon Hose: This will allow you to introduce antifreeze into the water lines.
- Air Compressor with Blow-Out Adapter: An air compressor helps to blow out any remaining water from the lines.
- Wrench: For removing and replacing drain plugs.
- Screwdrivers: For various tasks, such as removing access panels.
- Plumber's Tape: To seal any leaky connections.
- Basin or Bucket: To catch water and antifreeze.
- Gloves: To protect your hands.
- Safety Glasses: To protect your eyes.
- RV Water Line Antifreeze Hand Pump: (Alternative to converter kit, discussed below)
Step-by-Step Guide to Winterizing Your RV Water System
Follow these steps carefully to ensure a thorough winterization:
1 Drain the Water System Completely
This is the first and most important step. Drain all the water from your RV's water system. This includes:
- Fresh Water Tank: Locate the drain valve for your fresh water tank and open it. Allow all the water to drain out completely.
- Water Heater: Turn off the water heater and let it cool down completely. Then, remove the drain plug and allow the water to drain. Be extremely careful when handling the drain plug, as the water may still be hot. Many RVs have a bypass valve that allows you to isolate the water heater. If you have this, close the inlet and outlet valves to the water heater, and open the bypass valve. This prevents antifreeze from filling the water heater, saving you antifreeze and reducing the risk of contaminating the water heater with antifreeze residue.
- Hot and Cold Water Lines: Open all the faucets (including the shower) and flush the toilet to allow any remaining water to drain from the lines.
- Low Point Drains: Locate the low point drain valves (usually located underneath the RV) and open them. These valves are designed to drain the lowest points in the plumbing system.
2 Bypass the Water Heater
As mentioned earlier, bypassing the water heater is crucial. If your RV has a water heater bypass kit, close the inlet and outlet valves and open the bypass valve. This will prevent antifreeze from entering the water heater.
3 Install a Water Pump Converter Kit or Use a Siphon Hose
This step allows you to introduce antifreeze into the water lines. There are two main methods:
- Water Pump Converter Kit: This kit typically involves installing a small valve or fitting on the inlet side of the water pump. This allows you to switch the pump's intake from the fresh water tank to a container of antifreeze.
- Siphon Hose: A siphon hose is a simple tube that you attach to the inlet side of the water pump. You then place the other end of the hose into a container of antifreeze.
4 Pump Antifreeze Through the Water Lines
Now, it's time to pump antifreeze through the water lines. Follow these steps:
- Place the siphon hose or the hose from the converter kit into a container of RV antifreeze.
- Turn on the water pump.
- Open each faucet (both hot and cold) one at a time, and let the antifreeze flow until you see a steady stream of pink antifreeze coming out.
- Flush the toilet until you see pink antifreeze.
- Don't forget the outside shower (if you have one).
5 Pour Antifreeze into Drains and Toilet
Pour RV antifreeze into all the drains (shower, sinks) and the toilet. This will protect the P-traps from freezing.
6 Blow Out the Water Lines with Compressed Air (Optional but Recommended)
Using an air compressor to blow out the water lines is an optional but highly recommended step. This helps to remove any remaining water from the lines, reducing the risk of freezing. Here's how:
- Attach a blow-out adapter to the city water inlet.
- Set the air compressor to a low pressure (around 30-40 PSI). Do not exceed 40 PSI!
- Open each faucet (both hot and cold) one at a time, and let the air flow until no more water comes out.
- Flush the toilet until no more water comes out.
7 Final Steps and Checks
- Pour some RV antifreeze into the toilet bowl.
- Close all faucets.
- Turn off the water pump.
- Remove the drain plug from the water heater (if you haven't already).
- Inspect all plumbing connections for leaks.
- Consider adding antifreeze to your washing machine (if equipped) by running a short cycle with antifreeze.
- If your RV has an ice maker, consult the manufacturer's instructions for winterizing it.
Product Recommendations for RV Winterization
Here are some specific product recommendations to help you winterize your RV effectively:
RV Antifreeze
Camco RV Antifreeze: This is a popular and reliable brand of RV antifreeze. It's non-toxic and safe for potable water systems. Available in various sizes, including gallons and concentrated formulas. A gallon typically costs around $10-$15. Look for the "pink" antifreeze, as that indicates it's safe for potable water systems.
Star brite Star Safe RV Antifreeze: Another well-regarded brand known for its quality and effectiveness. It offers excellent freeze protection and is safe for all types of RV plumbing. Slightly more expensive, around $12-$18 per gallon.
Comparison: Both Camco and Star brite are excellent choices. Camco is generally more readily available and slightly more affordable. Star brite is often considered a premium option with potentially better freeze protection, although the difference is often negligible for most RV owners.
Water Pump Converter Kits
Camco Pump Converter Winterizing Kit: A simple and affordable kit that allows you to easily switch the water pump's intake to a container of antifreeze. Typically costs around $15-$25. Easy to install and use.
Valterra Winterize Kit: Similar to the Camco kit, but may offer slightly different fittings or installation options. Price range is comparable, around $18-$28.
Comparison: The main difference between these kits is the specific fittings included. Check the product description to ensure the kit is compatible with your RV's water pump.
Air Compressors
Viair 85P Portable Air Compressor: A compact and powerful air compressor that's perfect for RV use. It can be used for winterizing as well as inflating tires. Costs around $50-$70.
EPAuto Portable Air Compressor Pump: Another popular and affordable option. It's lightweight and easy to store. Typically priced around $30-$50.
Comparison: The Viair 85P is a more powerful and durable compressor, making it a better choice if you need to inflate tires frequently. The EPAuto is a more budget-friendly option that's suitable for occasional use.
RV Water Line Antifreeze Hand Pump
FloTool 10716BA Anti-Freeze Hand Pump: This is an excellent alternative if you don't want to modify your plumbing with a converter kit. You simply disconnect the inlet side of your water pump, attach this hand pump, and manually pump the antifreeze through the system. Easier for some to install. Costs around $20-$30.
Water Heater Bypass Kits
Many RVs come with a factory-installed bypass kit. If yours doesn't, you can purchase an aftermarket kit. These kits typically consist of three valves: one on the inlet side, one on the outlet side, and one that bypasses the water heater.
Universal Water Heater Bypass Kit: These are available at most RV supply stores and online retailers. Prices range from $30-$50 depending on the complexity of the kit.
Troubleshooting Common RV Winterization Problems
Even with careful planning, you may encounter some problems during the winterization process. Here are some common issues and how to resolve them:
Problem: Antifreeze Not Pumping Through the Lines
Possible Causes:
- Air in the water pump: Try priming the water pump by opening a faucet and letting it run for a few minutes.
- Clogged water pump filter: Clean or replace the water pump filter.
- Siphon hose not submerged in antifreeze: Make sure the siphon hose is fully submerged in the container of antifreeze.
- Kinked hose: Check all hoses for kinks or obstructions.
Problem: Leaks in Plumbing Connections
Possible Causes:
- Loose fittings: Tighten any loose fittings.
- Damaged O-rings: Replace any damaged O-rings.
- Cracked pipes: Replace any cracked pipes.
Problem: Difficulty Draining the Water Heater
Possible Causes:
- Clogged drain plug: Clean the drain plug.
- Air lock: Open a faucet to allow air to enter the water heater.
- Debris in the tank: Flush the water heater with a hose to remove any debris.
Problem: Cannot Locate Low Point Drains
Solution: Consult your RV's owner's manual. The location of the low point drains can vary depending on the RV model. They are usually located underneath the RV, near the plumbing lines.
RV Winterization Checklist for Peace of Mind
Use this checklist to ensure you've covered all the bases during the winterization process:
- [ ] Drain the fresh water tank.
- [ ] Drain the water heater.
- [ ] Bypass the water heater.
- [ ] Drain the hot and cold water lines.
- [ ] Open the low point drains.
- [ ] Install a water pump converter kit or use a siphon hose.
- [ ] Pump antifreeze through the water lines.
- [ ] Pour antifreeze into drains and toilet.
- [ ] Blow out the water lines with compressed air (optional).
- [ ] Pour some RV antifreeze into the toilet bowl.
- [ ] Close all faucets.
- [ ] Turn off the water pump.
- [ ] Remove the drain plug from the water heater (if you haven't already).
- [ ] Inspect all plumbing connections for leaks.
- [ ] Add antifreeze to your washing machine (if equipped).
- [ ] Winterize the ice maker (if equipped).
Long-Term RV Storage Tips for Winter
Beyond winterizing the water system, there are other steps you can take to protect your RV during long-term storage:
- Cover the RV: A good RV cover will protect your RV from the elements, including snow, rain, and sun.
- Remove the battery: Remove the battery and store it in a cool, dry place. Use a battery tender to keep it charged.
- Propane tanks: Turn off the propane tanks.
- Tires: Cover the tires to protect them from UV damage. Consider placing the RV on blocks to reduce stress on the tires.
- Interior: Remove all food and perishable items from the RV. Clean the interior thoroughly to prevent mold and mildew. Open cabinet doors and drawers to allow air circulation. Use moisture absorbers to prevent dampness.
- Rodent control: Take measures to prevent rodents from entering the RV. Set traps or use repellents. Seal any potential entry points.
The Cost of Neglecting RV Winterization
Ignoring the importance of RV winterization can lead to significant financial consequences. The cost of repairing frozen pipes, water pumps, or water heaters can easily run into the hundreds or even thousands of dollars. Furthermore, water damage can lead to mold growth, which can be expensive and difficult to remediate. The cost of antifreeze and a few simple tools is a small price to pay compared to the potential cost of repairs.
Spring De-Winterization: Preparing Your RV for the Road
Once the weather warms up, it's time to de-winterize your RV and get it ready for your next adventure. Here's how:
- Flush the water system: Flush the water system thoroughly with fresh water to remove all traces of antifreeze. Run water through all the faucets and the toilet until the water runs clear.
- Sanitize the water system: Sanitize the water system by adding a solution of bleach and water to the fresh water tank. Let the solution sit for several hours, then flush the system again.
- Reconnect the water heater: If you bypassed the water heater, reconnect it.
- Inspect plumbing connections: Inspect all plumbing connections for leaks.
- Test the water pump: Test the water pump to make sure it's working properly.
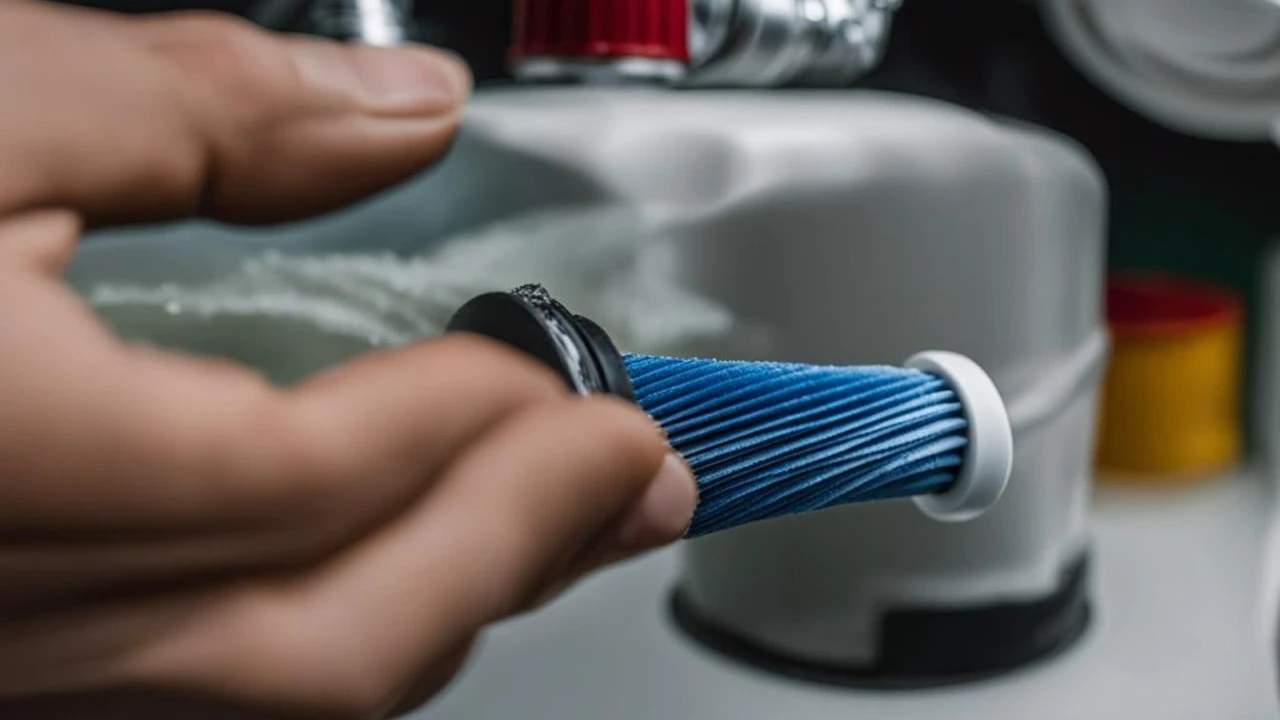
- Replace the water filter: Replace the water filter.
- Check the battery: Reinstall the battery and check its charge.
- Check the tires: Check the tire pressure and inspect the tires for damage.
RV Winterization Myths Debunked
There are several misconceptions about RV winterization. Let's debunk some common myths:
- Myth: "I don't need to winterize if I only live in a warm climate." Even if you live in a warm climate, you may still experience occasional freezing temperatures. It's better to be safe than sorry.
- Myth: "I can just use automotive antifreeze." Automotive antifreeze is toxic and should never be used in potable water systems.
- Myth: "I can skip blowing out the water lines with compressed air." Blowing out the water lines is highly recommended, as it helps to remove any remaining water and reduces the risk of freezing.
- Myth: "I only need to winterize the water system once." You should winterize your RV every time it will be exposed to freezing temperatures for an extended period.
Seeking Professional RV Winterization Services
If you're not comfortable winterizing your RV yourself, you can always hire a professional RV service technician. A professional can ensure that your RV is properly winterized and can identify any potential problems before they become major issues. The cost of professional winterization typically ranges from $100 to $300, depending on the size and complexity of your RV.
The Ultimate Guide to RV Winterization: Staying Warm and Worry-Free
Winterizing your RV's water system is a crucial part of RV ownership, especially if you live in an area with freezing temperatures. By following the steps outlined in this guide, you can protect your RV from costly damage and ensure that it's ready for your next adventure. Remember to gather the necessary tools and materials, follow the step-by-step instructions carefully, and don't hesitate to seek professional help if needed. With a little preparation and effort, you can enjoy worry-free RVing for years to come. The peace of mind knowing your RV is protected from the harsh winter elements is well worth the time and effort invested in proper winterization. So, take the necessary steps today and prepare your RV for a long, safe winter!
:max_bytes(150000):strip_icc()/277019-baked-pork-chops-with-cream-of-mushroom-soup-DDMFS-beauty-4x3-BG-7505-5762b731cf30447d9cbbbbbf387beafa.jpg)